BioloMICS logo
×
BioloMICS menu

Stock management

 
Full movie BioloMICS Stockmanagement (see below).
 
 
Everyone with a large collection of items needs to store them in a way that each item can be found easily when needed.
 
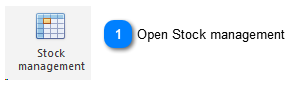
  • To open the Stock management, in the ribbon of the main window of BioloMICS, under Other Tools, in the Modules group, click Stock management.
     
    Stock management

     
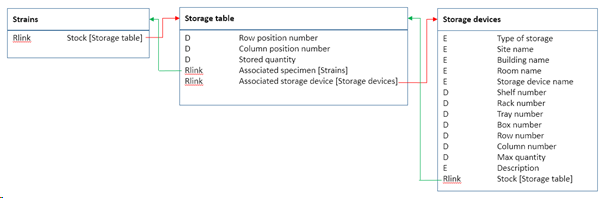
  • The following structure is needed to run the stock management successfully. For more details see Structure of table and fields.
        
  • To create the structure, go to table settings and add the preformatted tables: "Add stock management tables".
  • Create a table view for each of the tables and add all the fields.
     
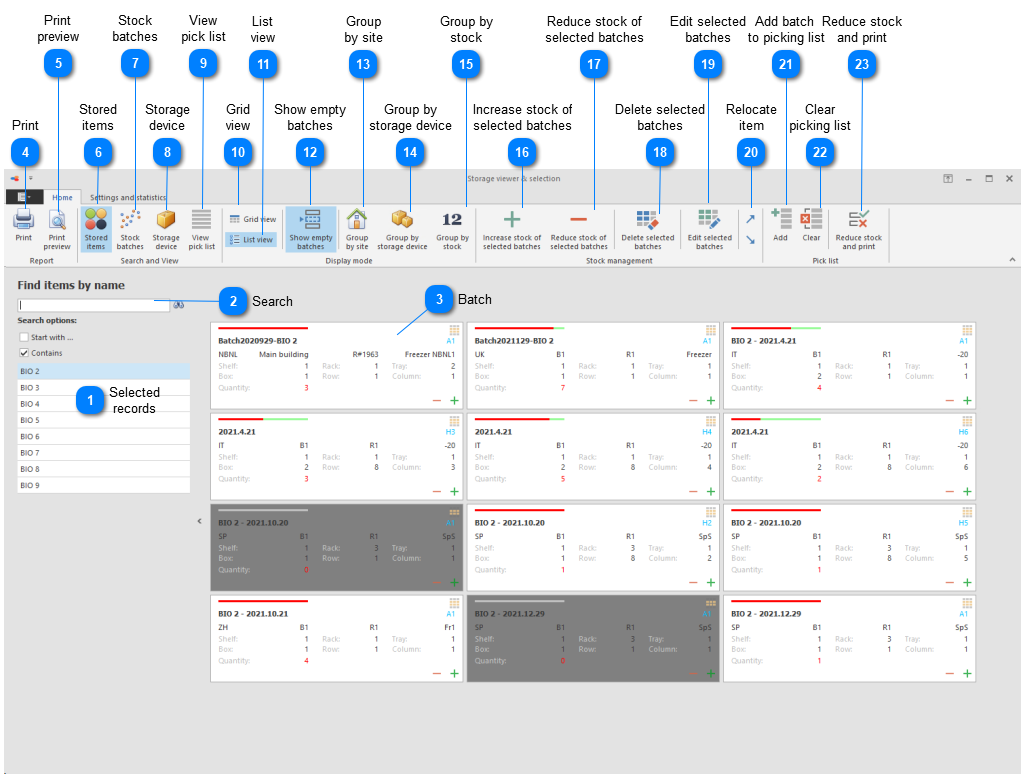
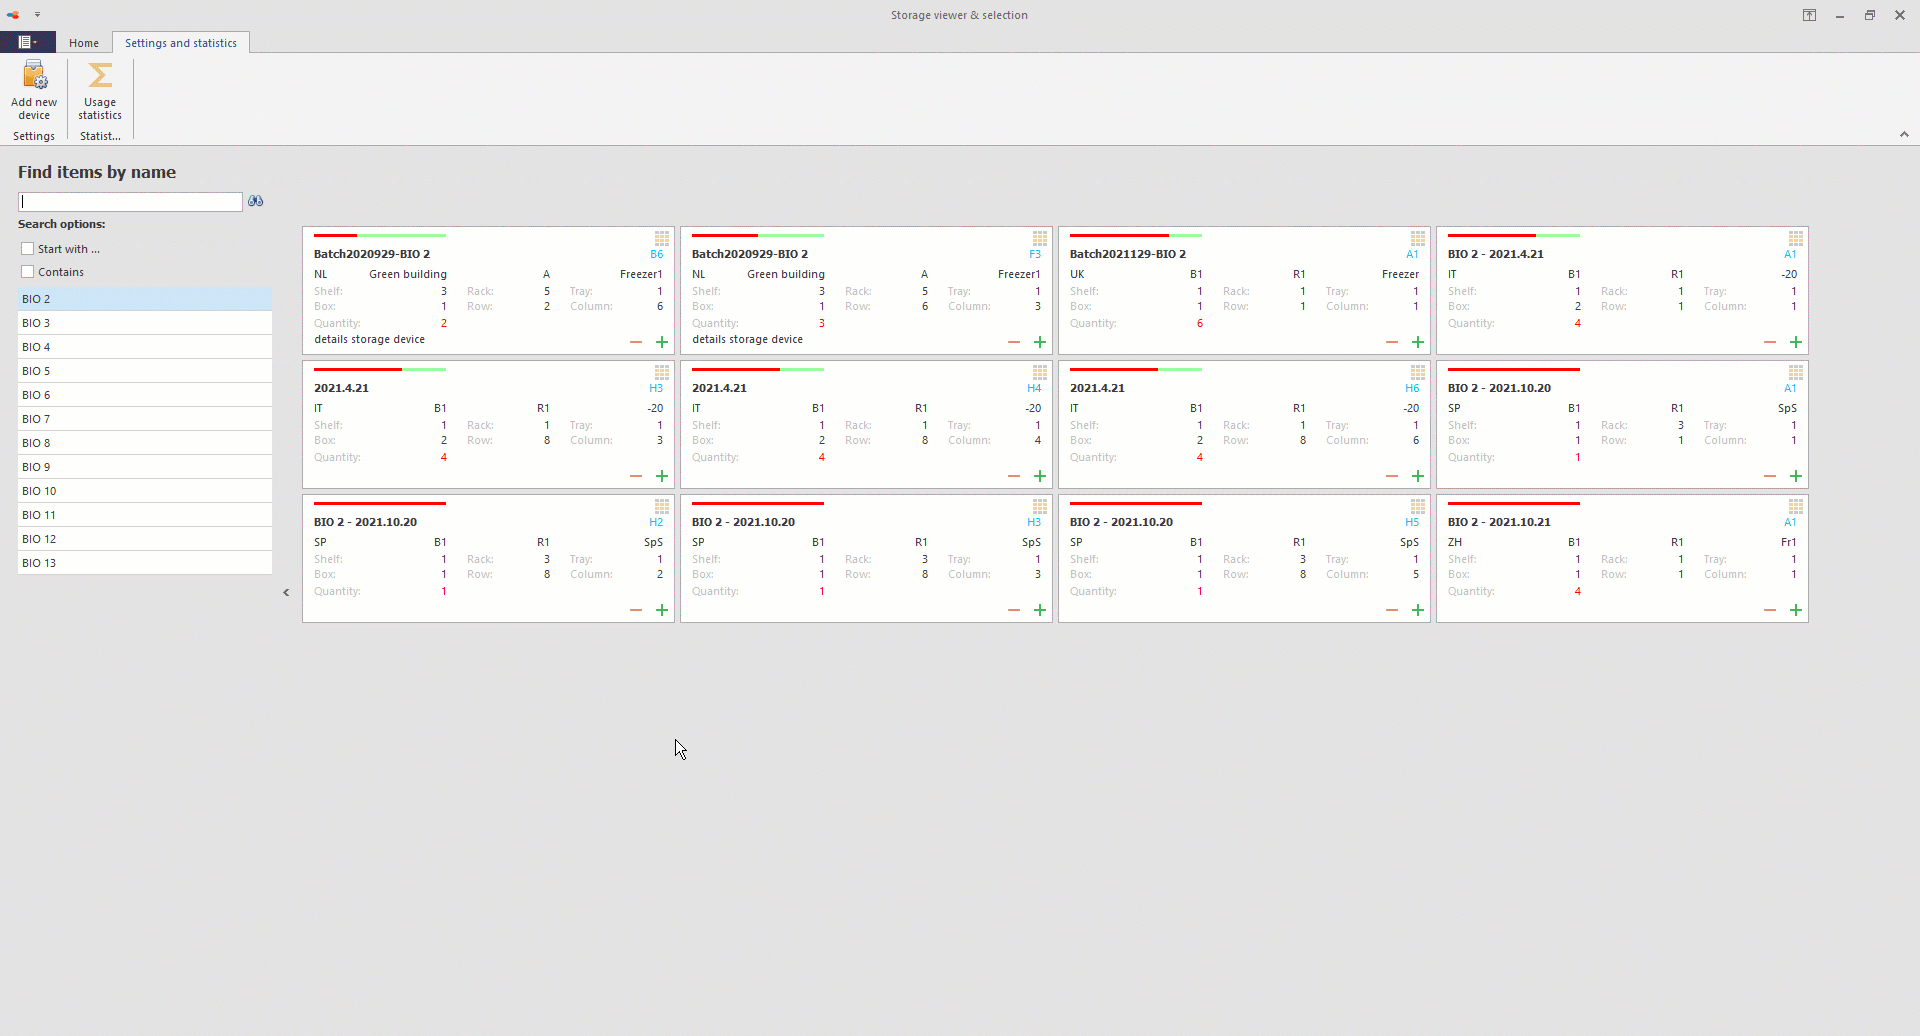
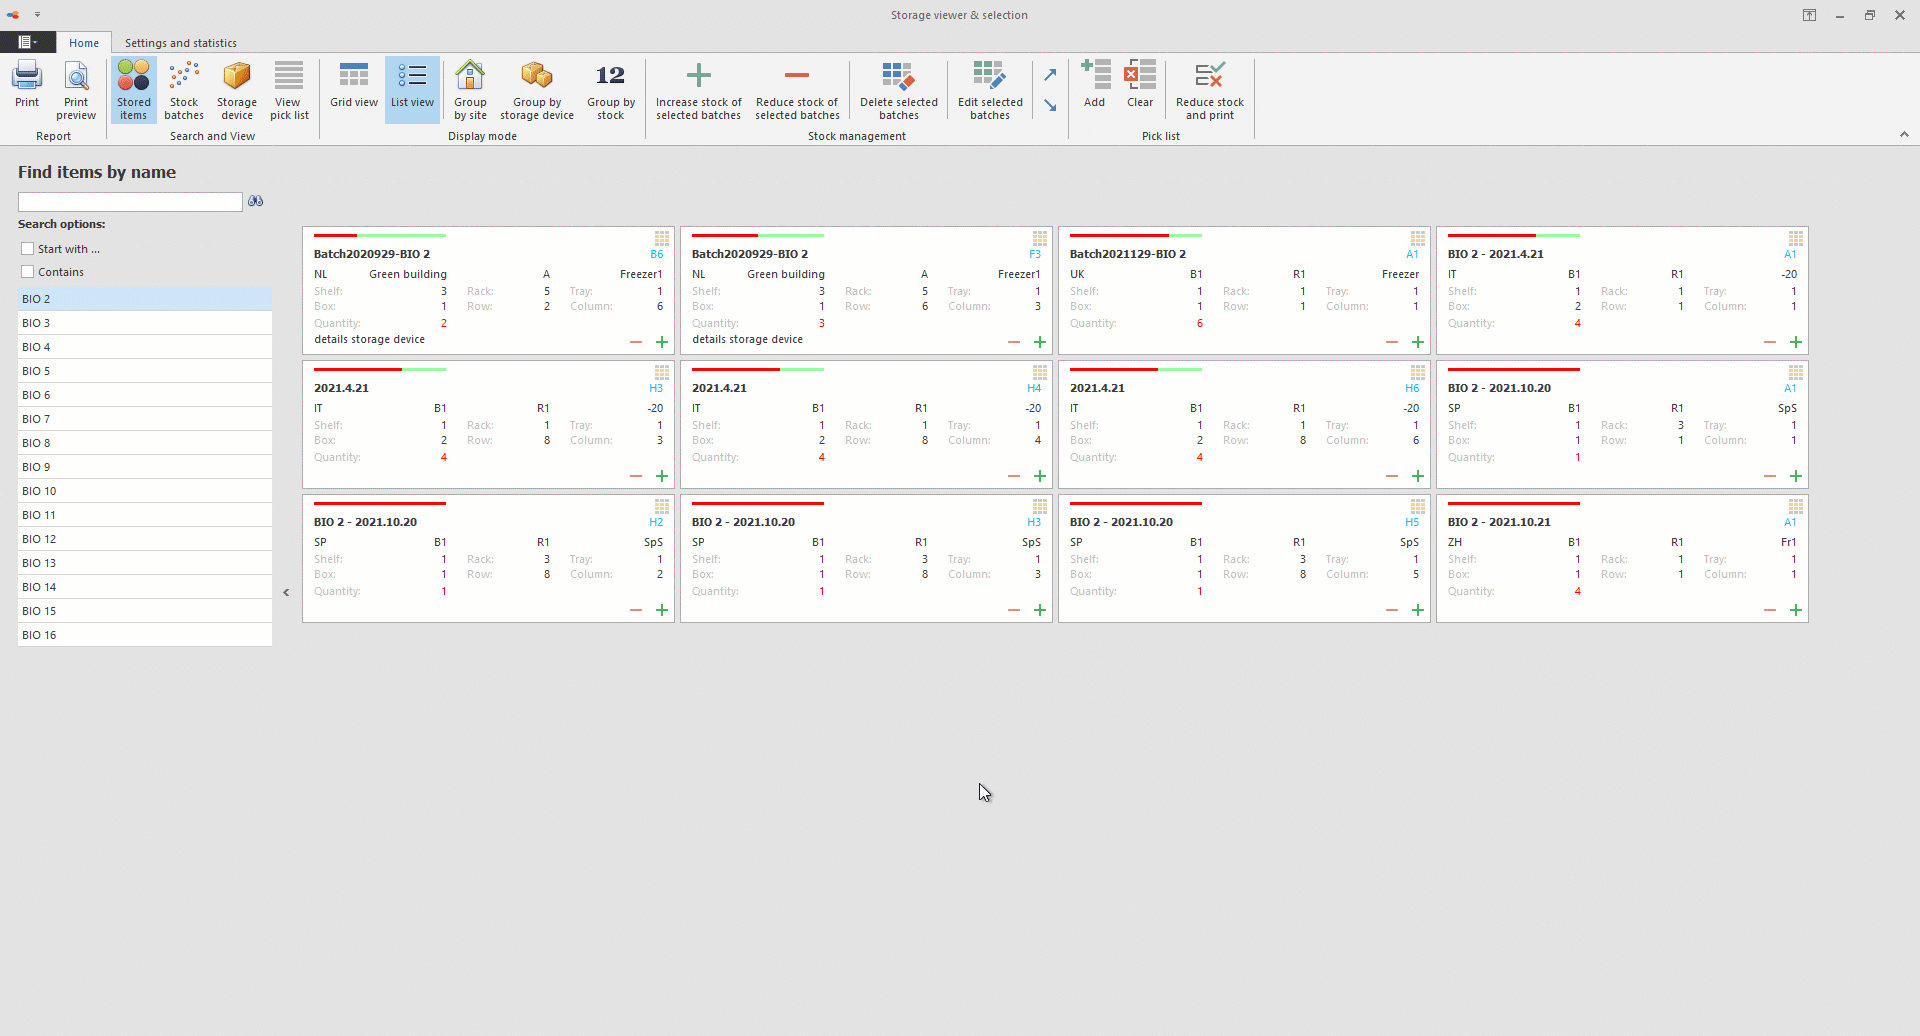
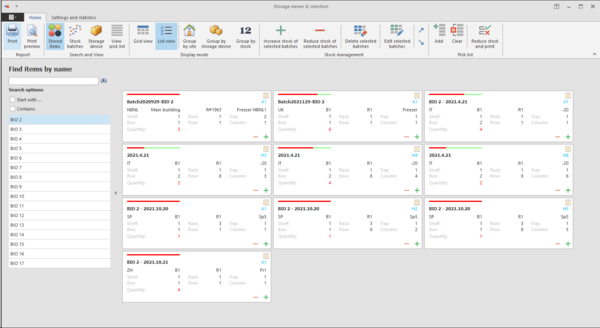
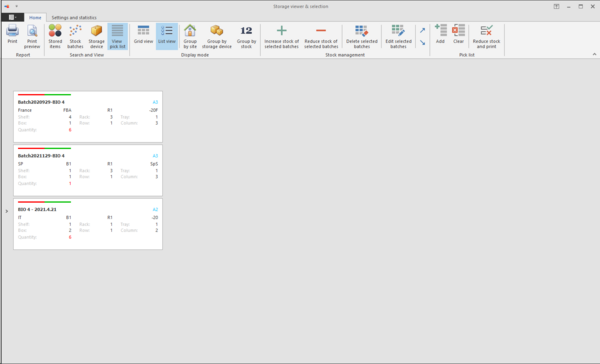
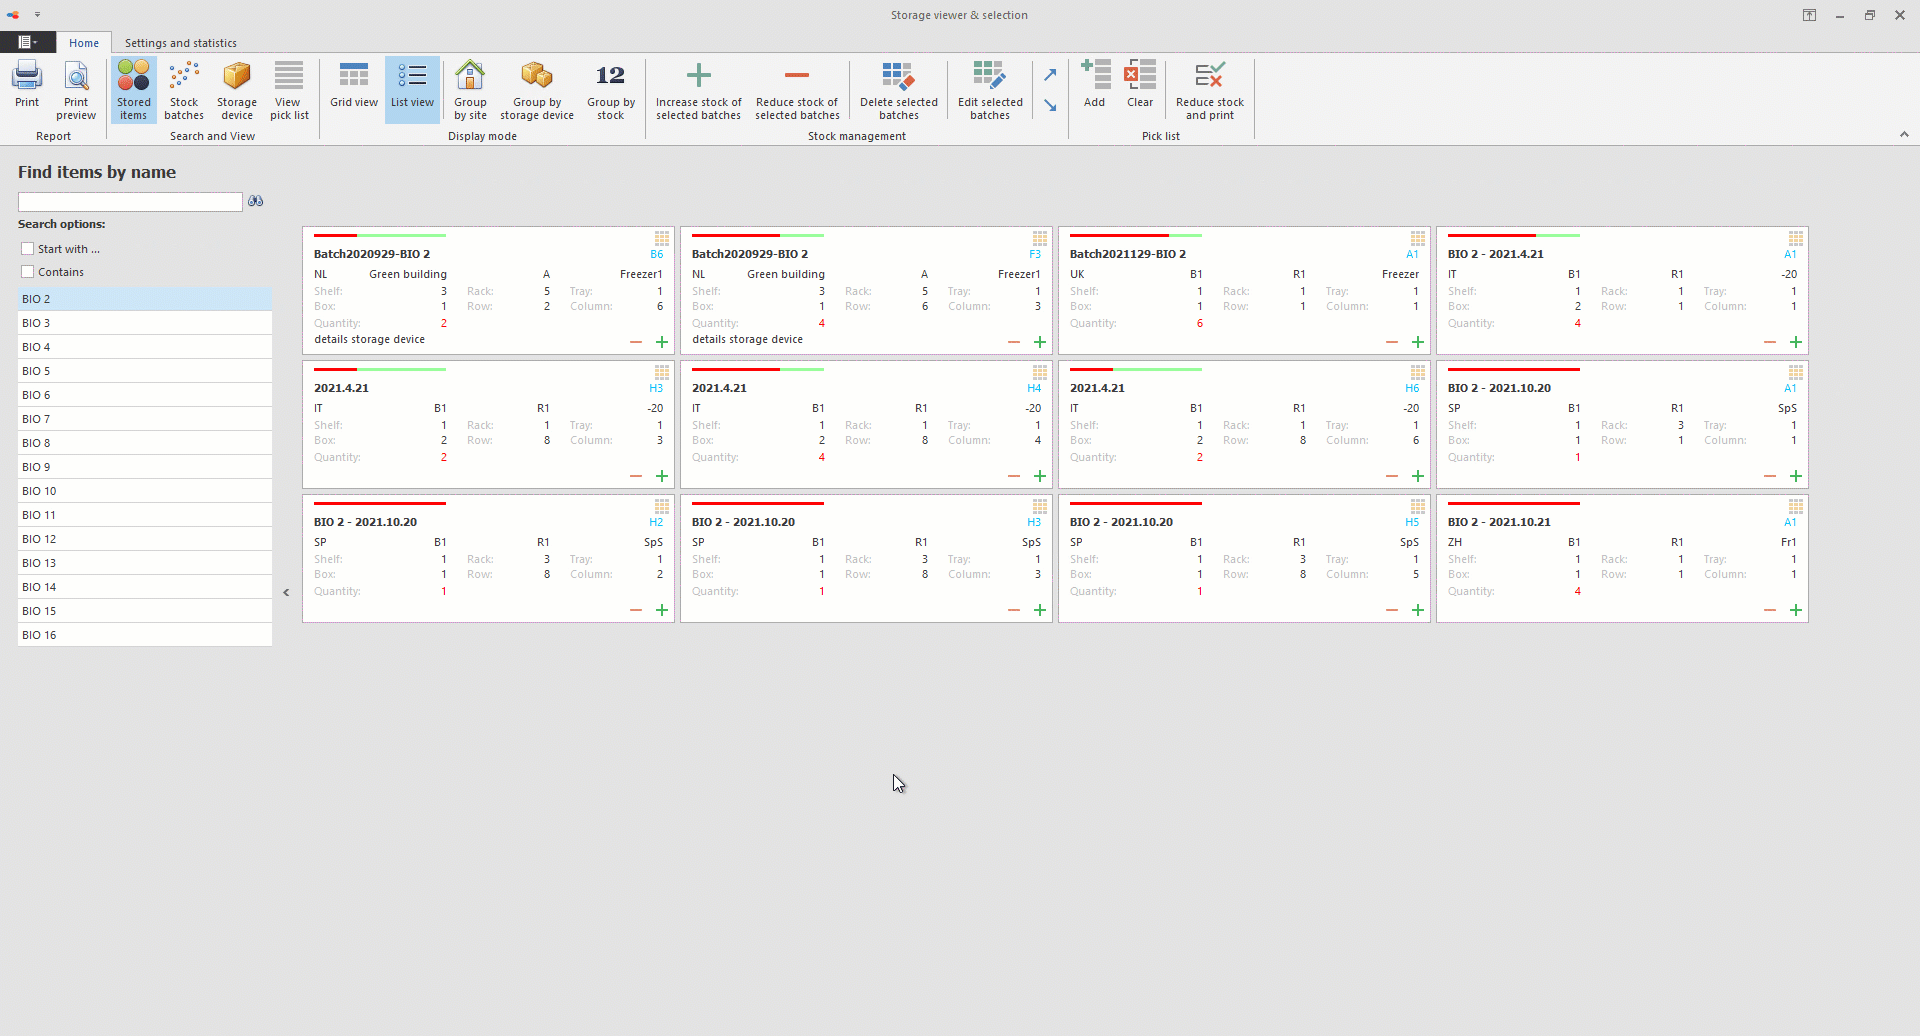
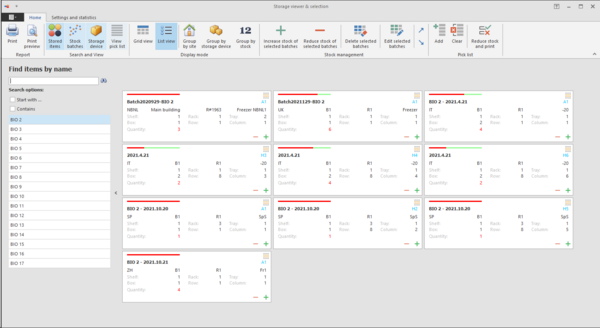
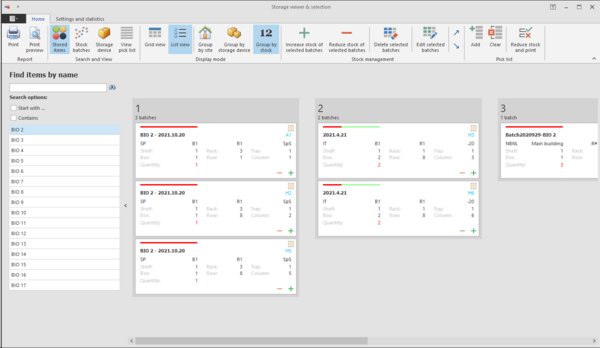
  • The stock management window appears, showing the selected record(s) from the grid, on the left side (#1).
     
    Stock management
     
  • Select a record from the list (#1) to see all batches it is stored in (#3).
     
  • Use the search box (# 2) to find the right item. Note that the search uses the operation Exact match.
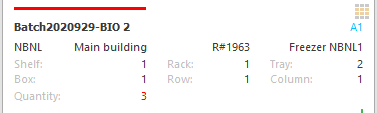
  • Click on the icon at the top right of a batch to see the content of the box.
     
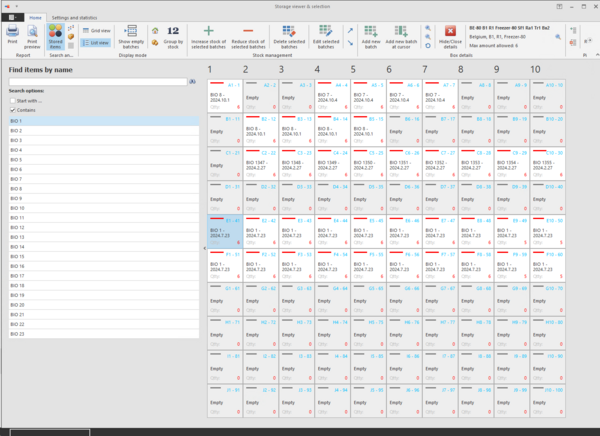
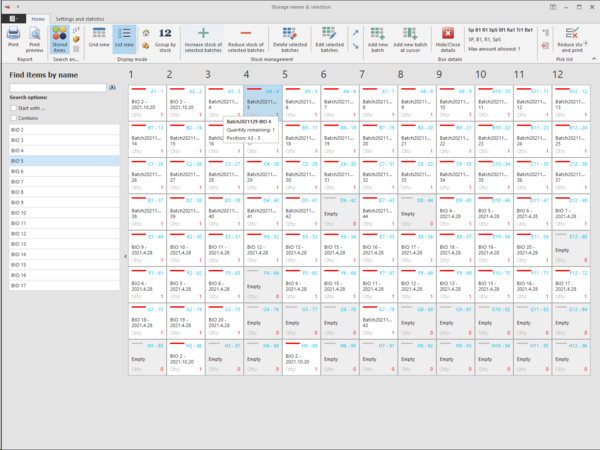
  • To place items/batches in another place use the relocation buttons (#19).
     
  • When a record in the main window of BioloMICS in locked then this record cannot be updated in the stock tool, a warning will be shown and the record needs to be unlocked first.
     
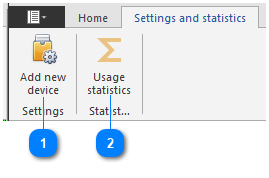
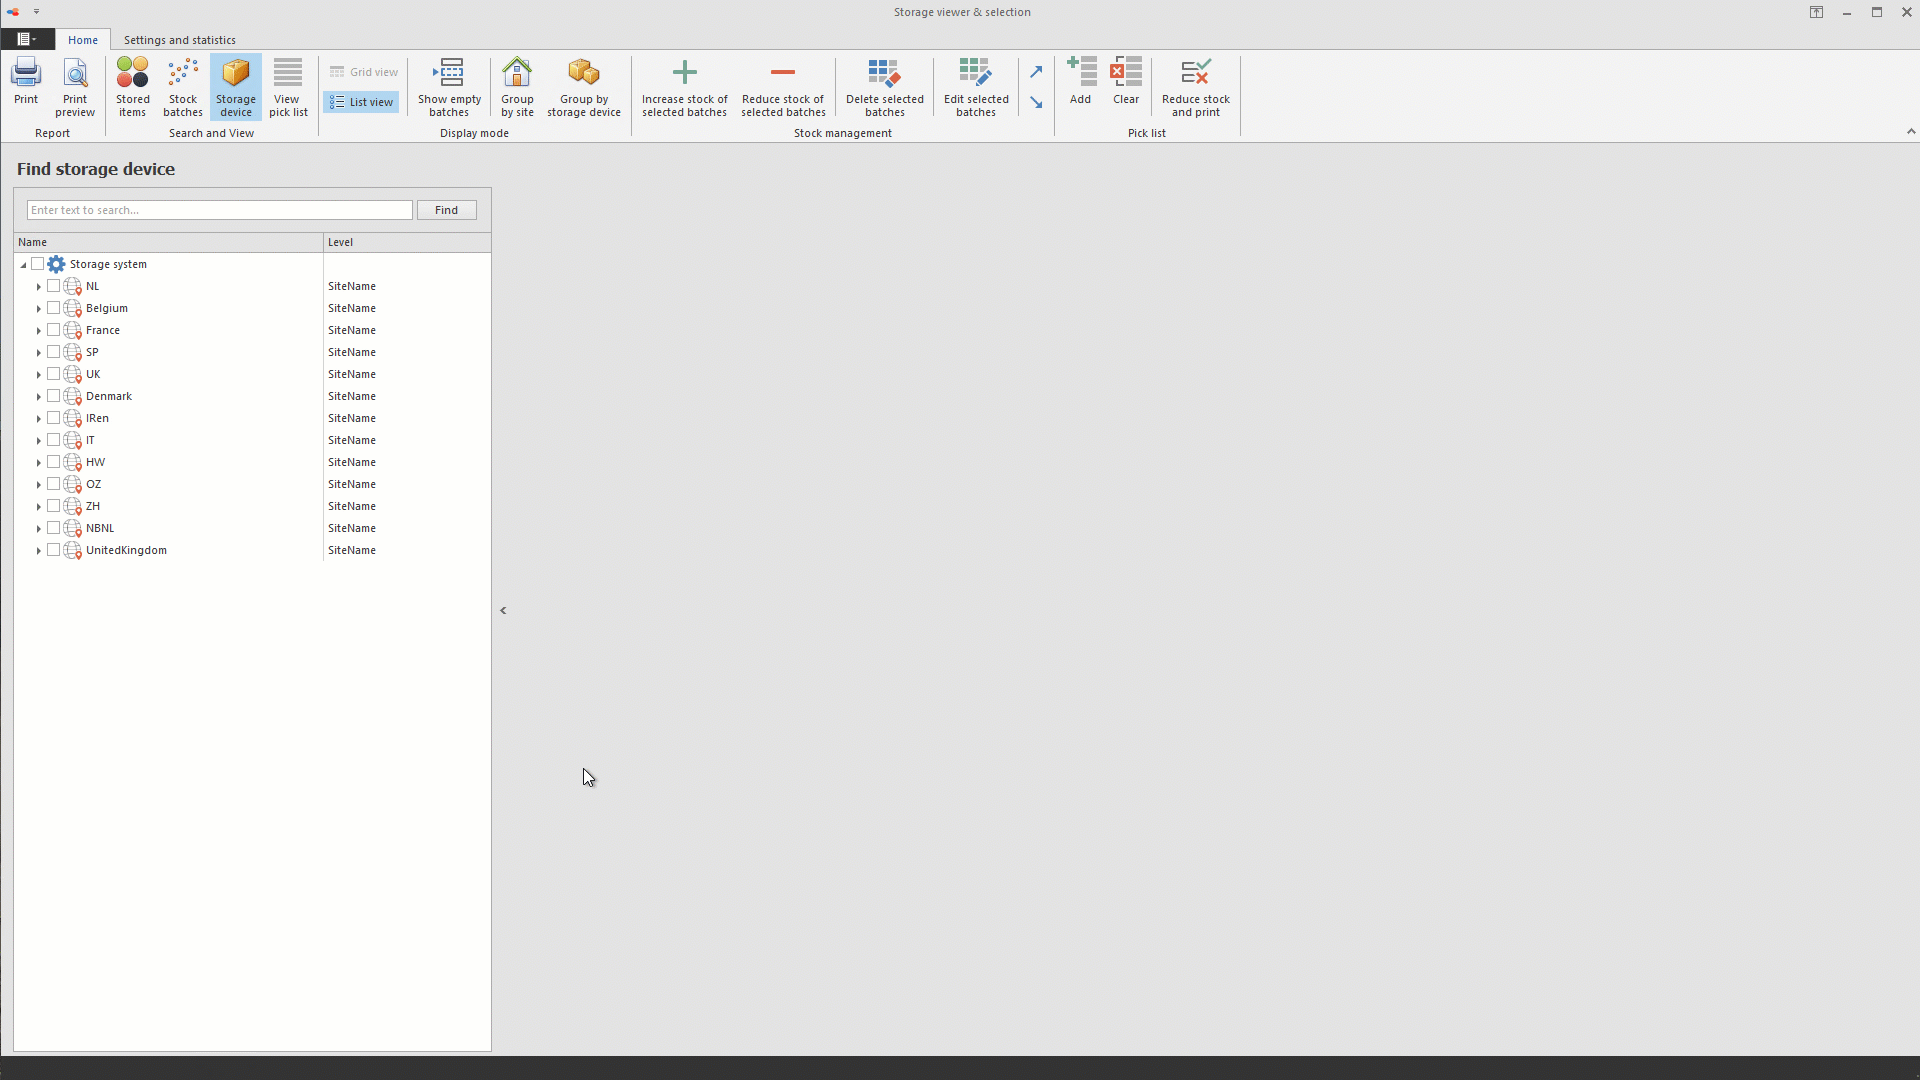
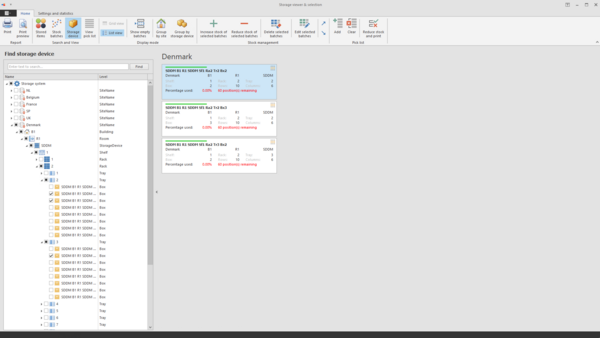
  • To add a new device and to see the statistics, in the ribbon of the stock management window, click Settings and statistics.
     
    Stock management
     
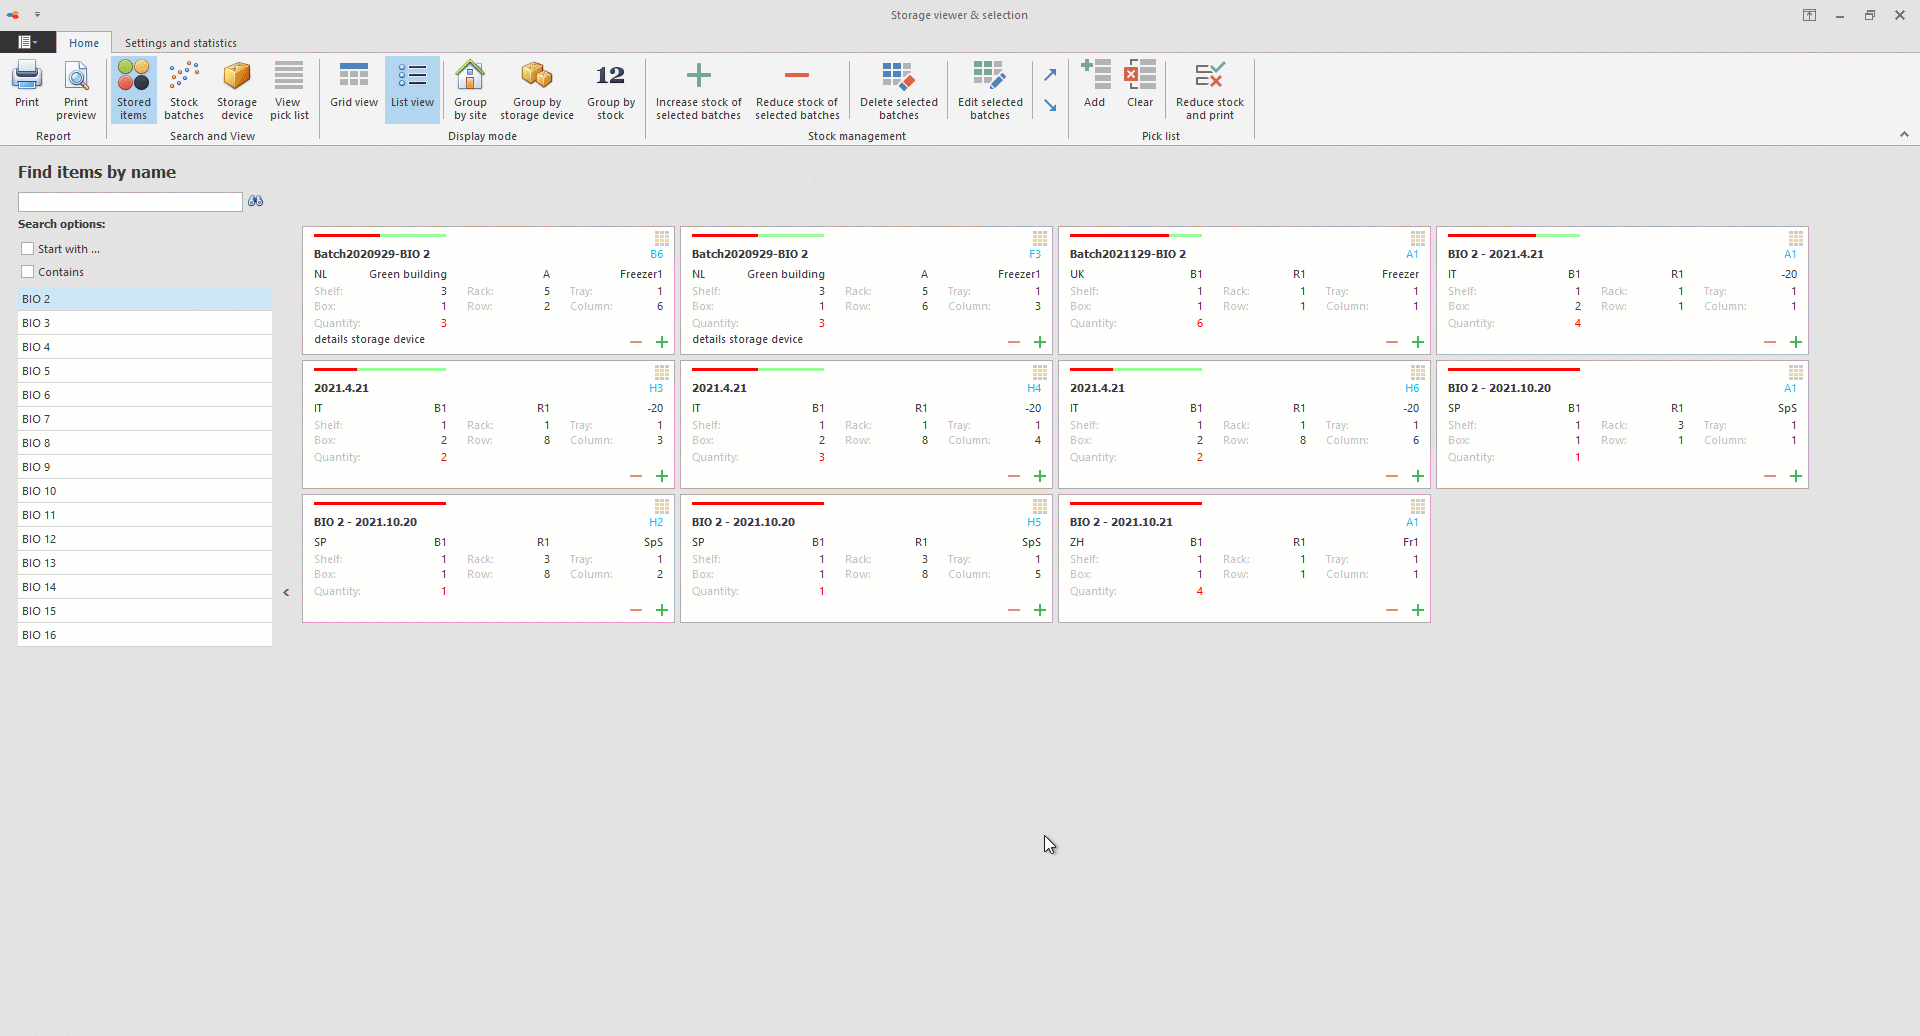
  • The text that is entered in the details field, in the storage devices table, will be visible on the tile in the stock management.
     
    In this example the text "details storage device" was added in the storage devices table and shown at the bottom left on the tile.


    1

    Open Stock management

    1. Open Stock management


    1
    1.
     
    A new device can be added to BioloMICS. Provide the needed information.


    See movie from 1:30
     
    2
    2.
     
    A summary of the usage of all devices stored in this database.


    1

    Selected

    records

     
    The records that were selected in the main window of BioloMICS before opening the stock management are displayed on the left.
     
     
    2

    Search

     
    Search for a specific item by record name, batch name or search for a specific storage device (depending on the selection of Search and View (#5)).
    Check the box "Start with ..." to search for a text that starts with the provided characters.
    Check the box "Contains" to search for a text that contains the provided characters.
     
     
    3

    Batch

    3. Batch
     
    The Batches shown are belonging to the selected record(s) in the list (#1).
     
    Click on the icon on the top right to open the box where this batch is stored.
     
     
    4

    Print

    4. Print
     
    Print the information.
     
     
    5

    Print

    preview

    5. Print
preview
     
    See a preview of the print.
     
     
    6

    Stored

    items

    6. Stored
items
     
    Search for or see the list of items/records selected from the grid in the main window in BioloMICS.


    7

    Stock

    batches

    7. Stock
batches
     
    Search for or see the batches a given item/record is stored in.


    8

    Storage

    device

    8. Storage
device
     
    Search for or see the boxes in the storage devices. It searches in the description-, details- and name-field.
     
    Click on check box to see all boxes in that level and below.
     
    Open the folder to see what is inside the current level.


    9

    View

    pick list

    9. View
pick list
     
    View the list of items that were added to the picking list (#20).


    To close the view of the picking list, click again on this button.
     
    Then click on the button stored items (#6) for example.
     
    10

    Grid

    view

    10. Grid
view
     
    See all batches of the selected record(s) in a grid like view.


    11

    List

    view

    11. List
view
     
    See all batches of the selected record(s) in a list-like view.
     
     
    12

    Show empty

    batches

    12. Show empty
batches
     
    When the stock of a given strain is 0, the batch in the stock management tool will automatically get a dark gray background.
    These batches are not displayed by default when the tool is opened.
    Click on the Show empty batches to display them.
    Click again on the same button to hide the empty batches again.
     
    13

    Group

    by site

    13. Group
by site
     
    See all batches of the selected record(s) grouped by site.


    14

    Group by

    storage device

    14. Group by
storage device
     
    See all batches of the selected record(s) grouped by storage device.
     
     
    15

    Group by

    stock

    15. Group by
stock
     
    See all batches of the selected record(s) grouped by stock (number of items left in the batch).


    16

    Increase stock of

    selected batches

    16. Increase stock of
selected batches
     
    Select one or more tiles/positions and click on this button to increase the quantity of stock.
     
     
    When the box is displayed, the items of the batch are displayed at the bottom right of each cell.
     
    To add an item to the batch, click on the cell(s)/batches and click on the button Increase stock of selected batches.
     
     
    To close the box, click on the button Hide/Close details.
     
    See movie from 2:35
     
    17

    Reduce stock of

    selected batches

    17. Reduce stock of
selected batches
     
    Select one or more tiles/positions and click on this button to reduce the quantity of stock.
     
     
    When the box is displayed, the items of the batch are displayed at the bottom right of each cell.
     
    To removed an item from the batch, click on the cell(s)/batches and click on the button Reduce stock of selected batches.
     
     
    To close the box, click on the button Hide/Close details.
     
    See movie from 3:25
     
    18

    Delete selected

    batches

    18. Delete selected
batches
     
    Delete the selected batch(es). Deletion must be confirmed.


    When the box is displayed, batches can be deleted too.
     
    See movie from 4:10
     
    19

    Edit selected

    batches

    19. Edit selected
batches
     
    Select one or more batches and click on this button.
     
    The selected batches will be shown in the grid in the main window of BioloMICS.
     
     
    20

    Relocate

    item

    20. Relocate
item
     
    Items/batches can be relocated in either the same box or another box.
     
    Click on the arrow up button to take the item/batch.

    Go to the new place where the item/batch should do to and click on the arrow down button.
     
     
    See movie from 3:35
     
    21

    Add batch

    to picking list

    21. Add batch 
to picking list
     
    Select one or more batches and click on this button.
     
    The items are now added to the picking list, which can be viewed (#9) and printed (#22).
     
     
    22

    Clear

    picking list

    22. Clear
picking list
     
    Clear the picking list from all items.
     
     
    23

    Reduce stock

    and print

    23. Reduce stock
and print
     
    All items that are in the picking list will be displayed in a new window.
     
    The message appears whether to reduce the amount of stock of each item in the list.


Movie can also be found on YouTube, BioloMICS Stockmanagement.
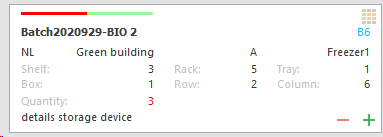
Please note that some buttons are moved to another place in the ribbon, the functionalities have not changed.