Order items through the cart (user)
When the cart has been activated, items can be ordered.
For instructions on how to setup the cart activation, see Activate cart (admin).
-
On the website, login by providing the email address and password: (website address/account/login)
-
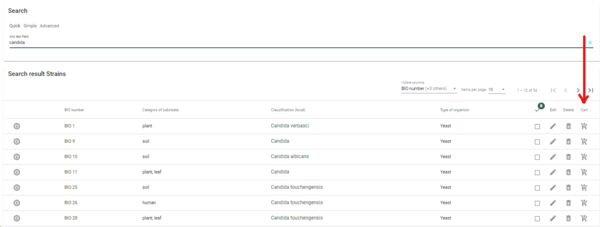
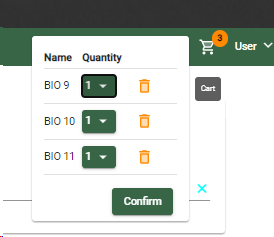
The item will be added to the cart, and when all items are included, click on the Confirm button to go to the cart-wizard/checkout.
-
Step 1. Terms and conditions.
-
Check all the checkboxes before going to the next step.
-
The text displayed in this step is set in the Order template.
-
When multiple types of items are being sold (e.g. Strains and books), then each type will have it's own Order template and therefore an own checkbox in this step.
-
When a Global order template is present then that checkbox text will also be present here.
-
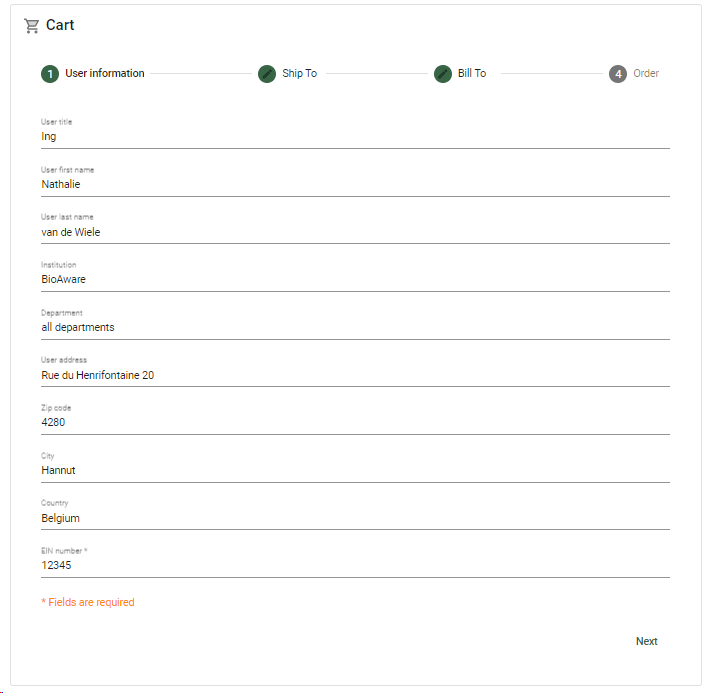
Step 2. User information.
The data here is about the user logged in (the buyer).
Note, this step may be hidden, in case the admin has decided that the user information may not be edited.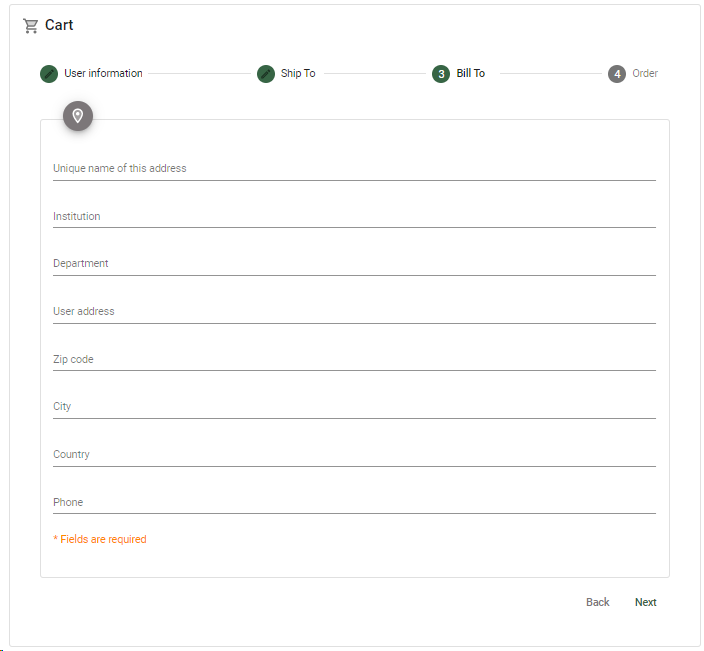
-
The data can be updated if preferred.
-
Click next to go to the next step.
-
This step is only visible when 'Can edit user profile' is checked in the General settings - Cart [6:27]
-
A form template must first be created based on the Userlist table.
-
This form template should be selected in the General settings - Cart.
-
Step 3: Ship to.
The data here is about where to ship the items to.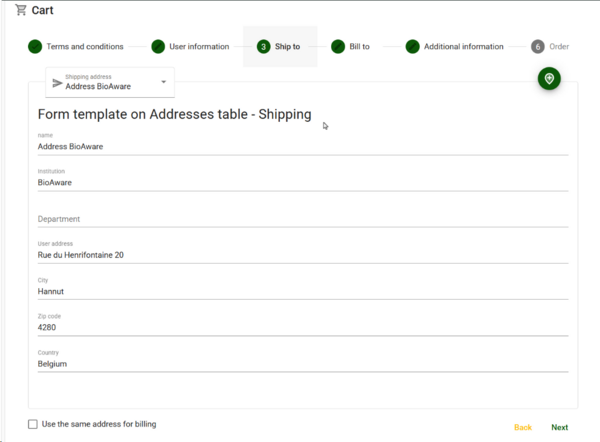
-
Shipping details can be entere.
-
If the details were entered before then they can be retrieved again by clicking on the Shipping address dropdown at the top left.
-
New addresses can be added by clicking on the + icon at the top right.
-
Check the checkbox "Use the same address for billing" to skip the next step and to go directly to the step Additional information.
Note, this checkbox is only present when it is enabled by the webcurator / admin.
-
Click next to go to the next step.
-
The form template must first be created based on the Addresses table (Shipping form).
-
This template should be selected in the General settings - Cart.
-
The presence of the checkbox 'Use the same address for billing' can be set in the General settings - Cart [6:49]
-
Step 4: Bill to.The data here is about where to send the bill to.theOnly shown if checkbox in previous step was not checked.
-
Billing details can be entered.
Note. This step is only shown if checkbox in previous step was not checked.
-
Click next to go to the next step.
-
The form template must first be created based on the Addresses table (Billing form).
-
This template should be selected in the General settings - Cart.
-
Step 5: Additional information.
This step shows extra fields where information can be added specifically for this order.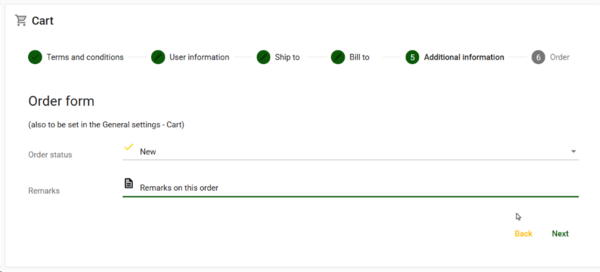
-
Enter the values for the provided fields.
-
Click next to go to the next step.
-
The Order form template must first be created. The table behind is automatically set.
-
This template should be selected in the General settings - Cart.
-
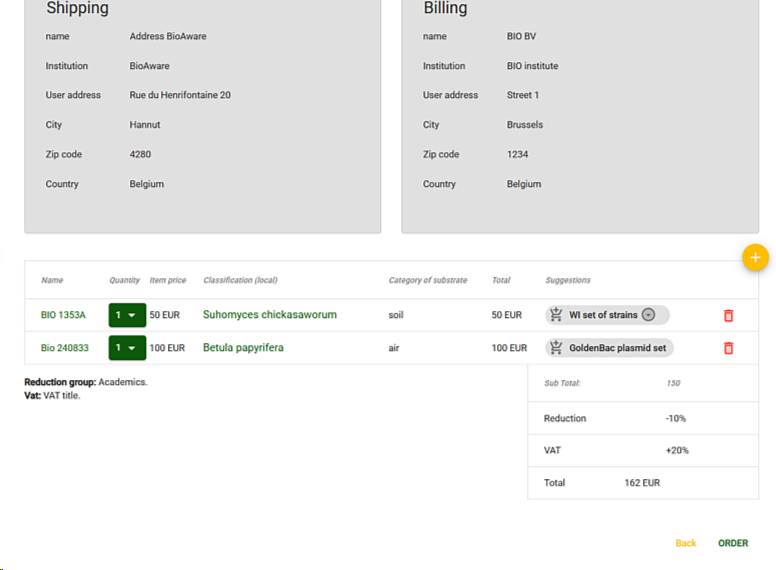
Step 6: Order.On top the shipping and billing details are displayed.Below that are the ordered items with extra information including the total price per line (Unit price multiplied by the quantity).
-
The quantity for each item can be adapted.
-
Suggestions can be added by clicking on the cart icon in front (to add all items of that set), or use the arrow to add a single suggested item.
-
Click Order to submit the order.
-
A Display template is to be created on the Addresses table for the Shipping details (Shipping display).
-
A Display template is to be created on the Addresses table for the Billing details (Billing display).
-
The details are set in the Order template.
-
All templates have to be selected in the General settings - Cart.
-
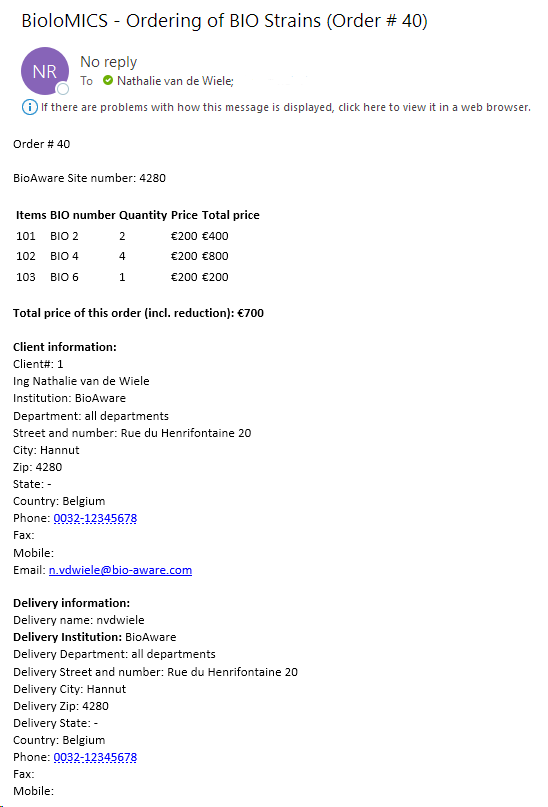
An email is sent to the person ordering as well as to the managers.
-
The subject and body of the emails (to buyer and manager(s)) are set in the properties of the Order template (#11 and #12).
*Note that a trigger can be activated to calculate the discount depending on the user groups of the user ordering.See Trigger for discount on orders for more information